Laravel 8 CRUD Tutorial
In this step by step tutorial, we will show you how to build a CRUD grid in Laravel 8. The front page of the grid is made in Tailwind CSS, which is the default CSS engine for the official Laravel package.
Requirement
You should have a basic understanding of the following tools below, since we are using them in the tutorial.
Environment
This application in this tutorial was built in the environment as show below:
- MacOS
- Laravel 8
- TailwindCSS v2
- MySQL 8
Initialise the project
Start Homestead
Let's first start the Homestead:
> cd ~/Documents/work/homestead
> vagrant up
SSH into the virtual machine:
> vagrant ssh
Navigate to the ~/code directory because Homestead consider it as the default root directory:
vagrant@homestead$ cd ~/code
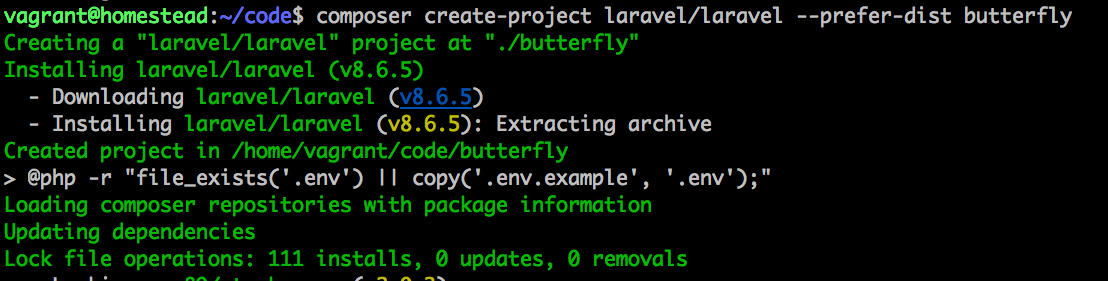
Initialise a new Laravel project and name it butterfly:
vagrant@homestead$ composer create-project laravel/laravel --prefer-dist butterfly
Modify the host file
Next we need to add an entry in /etc/hosts file, note this will require a root access permission.
> sudo vim /etc/hosts
Enter the following entry (make sure 192.168.56.10 match the value of ip in file Homestead.yaml):
192.168.56.10 homestead.test
Modify sites setting in Homestead, this way, we can view butterfly inside public directory:
> cd ~/Documents/work/homestead
> vim Homestead.yaml
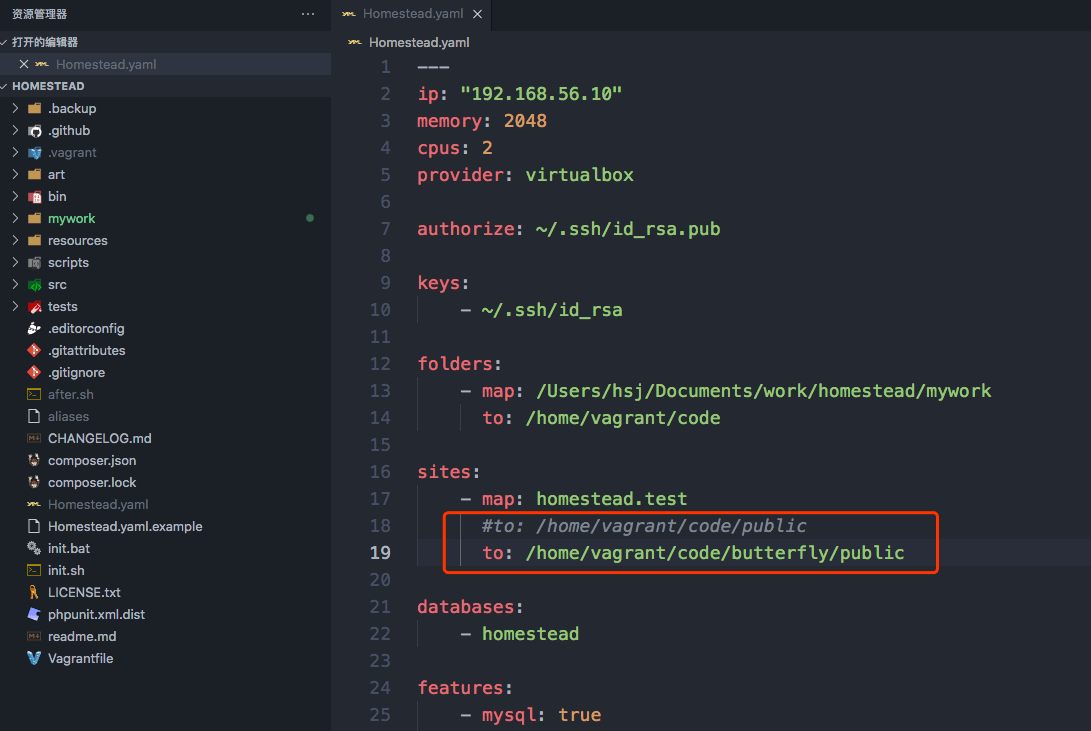
Change the default /home/vagrant/code/public to /home/vagrant/code/butterfly/public:
Restart vagrant:
> vagrant reload --provision
Now we should be able to browser to http://homestead.test:
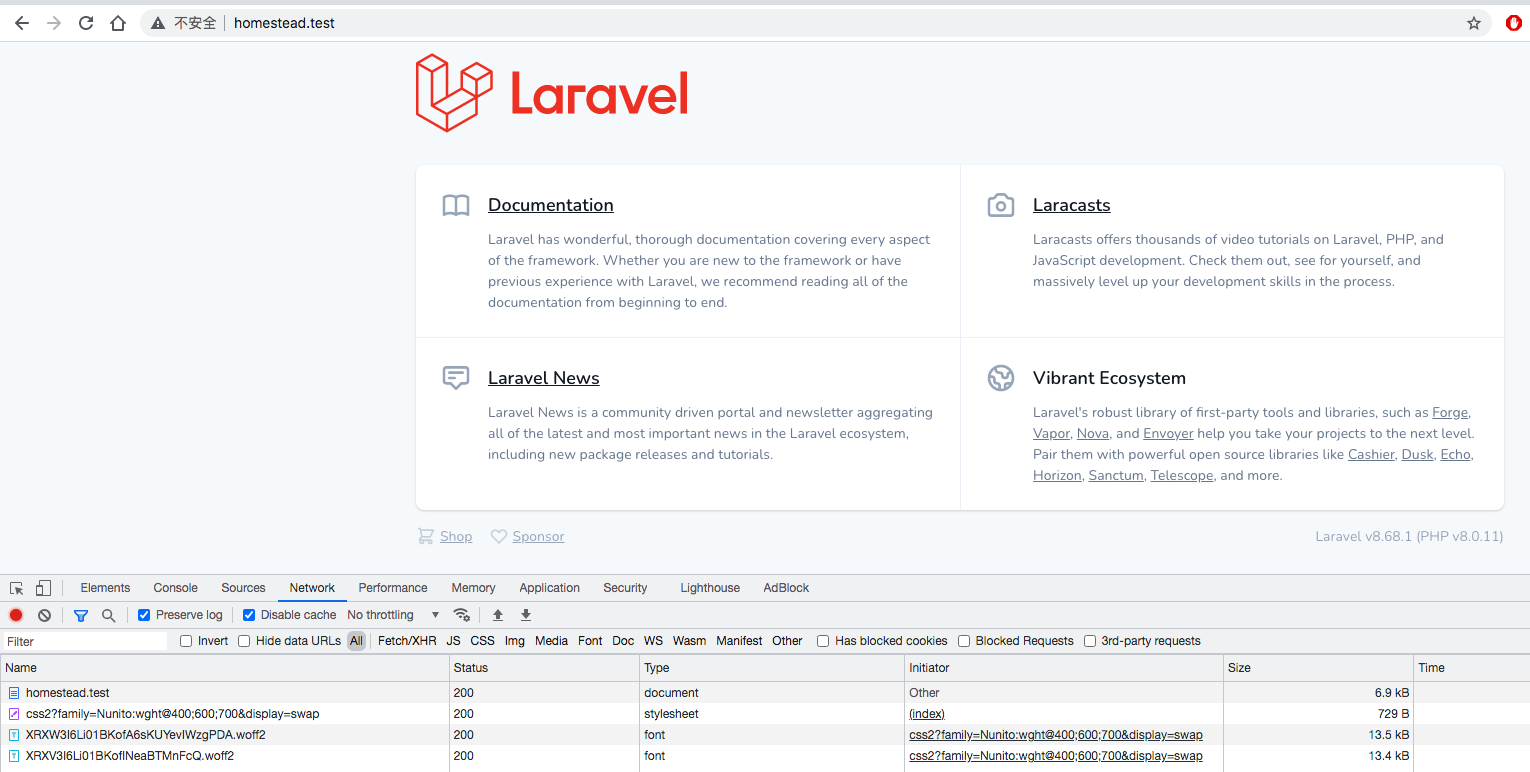
Perfect!
The first page
All the actions below are done inside the butterfly directory.
Add page
Create a new blade file butterfly.blade.php in resources/viewsdirectory, Meanwhile let's add in tailwindcss to prettify our pages:
<!DOCTYPE html>
<html lang="en">
<head>
    <meta charset="UTF-8">
    <meta name="viewport" content="width=device-width, initial-scale=1.0">
    <link rel="stylesheet" href="https://cdn.jsdelivr.net/npm/tailwindcss@2.2.17/dist/tailwind.min.css">
    <title>Butterfly</title>
</head>
<body class="flex justify-center">
  <div class="-my-2 overflow-x-auto sm:-mx-6 lg:-mx-8">
    <div class="py-2 align-middle inline-block min-w-full sm:px-6 lg:px-8">
      <div class="shadow overflow-hidden border-b border-gray-200 sm:rounded-lg">
        <table class="min-w-full divide-y divide-gray-200">
          <thead class="bg-gray-50">
            <tr>
              <th scope="col" class="px-6 py-3 text-left text-xs font-medium text-gray-500 uppercase tracking-wider">
                Name
              </th>
              <th scope="col" class="px-6 py-3 text-left text-xs font-medium text-gray-500 uppercase tracking-wider">
                Title
              </th>
              <th scope="col" class="px-6 py-3 text-left text-xs font-medium text-gray-500 uppercase tracking-wider">
                Options
              </th>
            </tr>
          </thead>
          <tbody class="bg-white divide-y divide-gray-200">

            <tr>
              <td class="px-6 py-4 whitespace-nowrap">
                <div class="flex items-center">
                  <div class="flex-shrink-0 h-10 w-10">
                    <img class="h-10 w-10 rounded-full" src="https://images.unsplash.com/photo-1494790108377-be9c29b29330?ixlib=rb-1.2.1&ixid=eyJhcHBfaWQiOjEyMDd9&auto=format&fit=facearea&facepad=4&w=256&h=256&q=60" alt="">
                  </div>
                  <div class="ml-4">
                    <div class="text-sm font-medium text-gray-900">
                      Jane Cooper
                    </div>
                    <div class="text-sm text-gray-500">
                      jane.cooper@example.com
                    </div>
                  </div>
                </div>
              </td>
              <td class="px-6 py-4 whitespace-nowrap">
                <div class="text-sm text-gray-900">Regional Paradigm Technician</div>
                <div class="text-sm text-gray-500">Optimization</div>
              </td>
              <td class="px-6 py-4 whitespace-nowrap text-right text-sm font-medium">
                <a id="show" href="{{ route('butterfly.show', ['butterfly' => $butterfly->id]) }}" class="text-indigo-500 hover:text-indigo-800 mx-5">Show</a>
                <a id="edit" href="{{ route('butterfly.show', ['butterfly' => $butterfly->id]) }}" class="text-yellow-500 hover:text-yellow-800 mx-5">Edit</a>
                <a id="delete" href="#" class="text-red-500 hover:text-red-800 mx-5">Delete</a>
              </td>
            </tr>

            <!-- More people... -->

          </tbody>
        </table>
        <div class="px-4 py-3 bg-gray-50 text-right sm:px-6">
          <a href="{{ route('butterfly.create') }}">
            <button class="inline-flex justify-center py-2 px-4 border border-transparent shadow-sm text-sm font-medium rounded-md text-white bg-indigo-600 hover:bg-indigo-700 focus:outline-none focus:ring-2 focus:ring-offset-2 focus:ring-indigo-500">
              Create New
            </button>
          </a>
        </div>
      </div>
    </div>
  </div>
</body>
</html>
Create a controller
Run command php artisan:
$ php artisan make:controller ButterflyController -r
Controller created successfully.
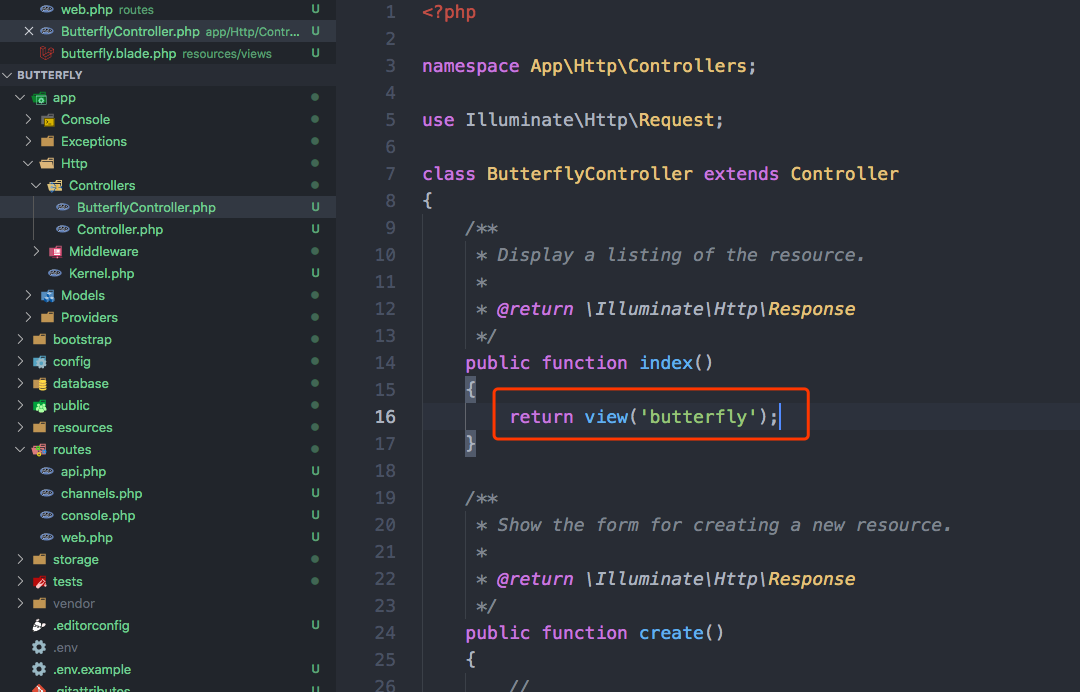
You should be able to see a controller file at app/Http/Controllers/ButterflyController.php. We need to add an additional method index in ButterflyController controller:
return view('butterfly');
Add some routes
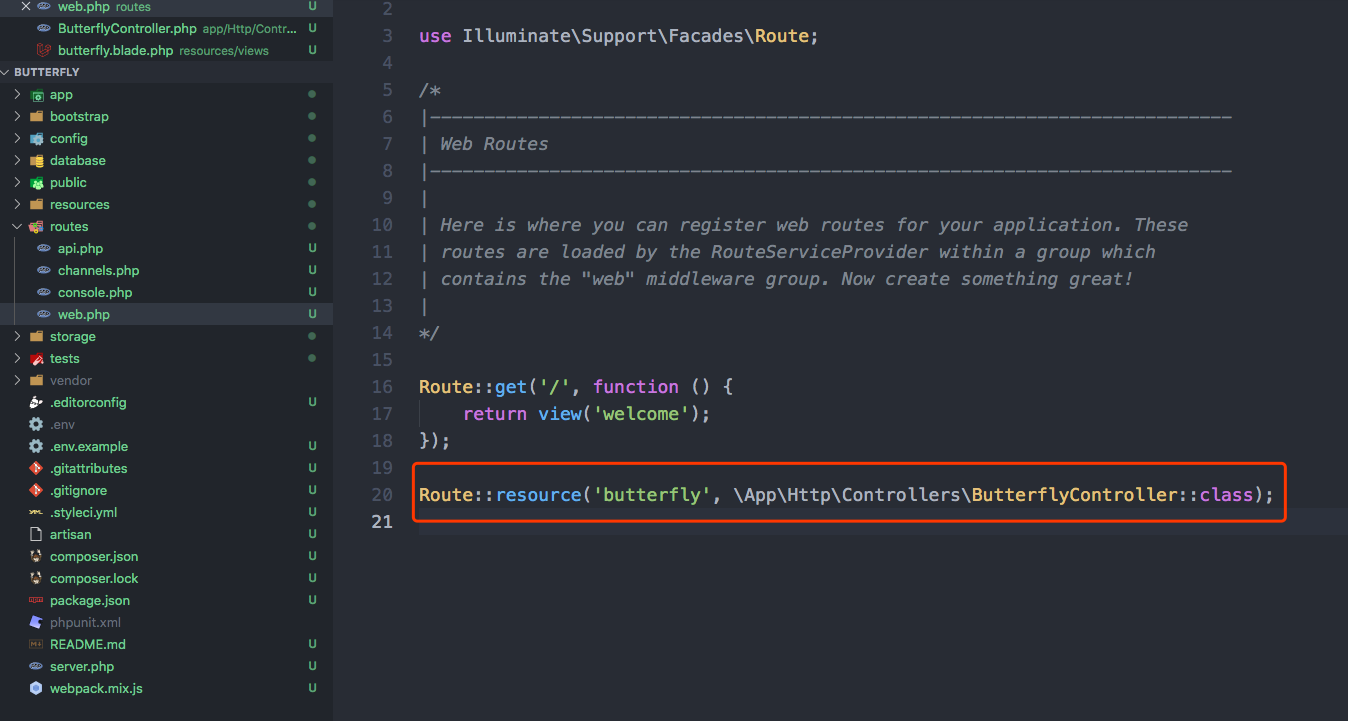
Add additional route to the route file routes/web.php:
Route::resource('butterfly', \App\Http\Controllers\ButterflyController::class);
The route above is equivalent to 7 routes combined as shown below:
Route::get('butterfly', [\App\Http\Controllers\ButterflyController::class, 'index'])->name('butterfly.index');
Route::post('butterfly', [\App\Http\Controllers\ButterflyController::class, 'store'])->name('butterfly.store');
Route::get('butterfly/create', [\App\Http\Controllers\ButterflyController::class, 'create'])->name('butterfly.create');
Route::get('butterfly/{butterfly}', [\App\Http\Controllers\ButterflyController::class, 'show'])->name('butterfly.show');
Route::put('butterfly/{butterfly}', [\App\Http\Controllers\ButterflyController::class, 'update'])->name('butterfly.update');
Route::delete('butterfly/{butterfly}', [\App\Http\Controllers\ButterflyController::class, 'destroy'])->name('butterfly.destroy');
Route::get('butterfly/{butterfly}/edit', [\App\Http\Controllers\ButterflyController::class, 'edit'])->name('butterfly.edit');
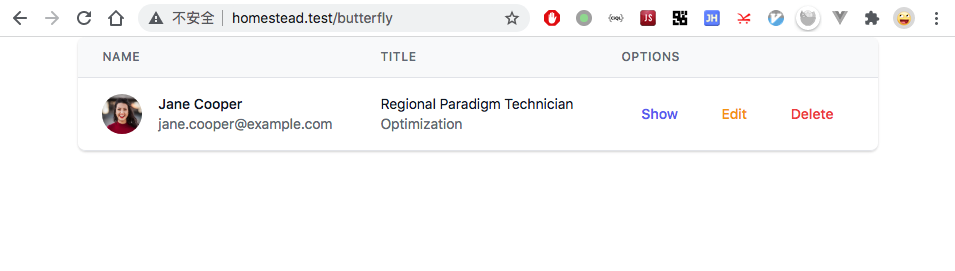
So far so good, let's browse to http://homestead.test/butterfly to see if we can visit the page:
Create database
Before we can use the migration feature, we need to make sure the database connection work well. You can skip this step if you have already done so.
Modify the .env file
Firstly, modify the .env file, change DB_DATABASE=laravel to DB_DATABASE=homestead, and DB_PASSWORD=改为DB_PASSWORD=123456.
Run the command below in the vagrant machine:
mysql> CREATE USER 'root'@'localhost' IDENTIFIED BY '123456';
mysql> ALTER USER 'root'@'localhost' IDENTIFIED WITH mysql_native_password BY '123456';
mysql> GRANT ALL PRIVILEGES ON *.* TO 'root'@'localhost' WITH GRANT OPTION;
mysql> FLUSH PRIVILEGES;
Create model
Run the command below in the root directory of the vagrant machine:
$ php artisan make:model Butterfly -m
Model created successfully.
Created Migration: 2021_10_30_060148_create_butterflies_table
Please note the -m option, this will generate a migration file for table butterflies in database/migrations directory.
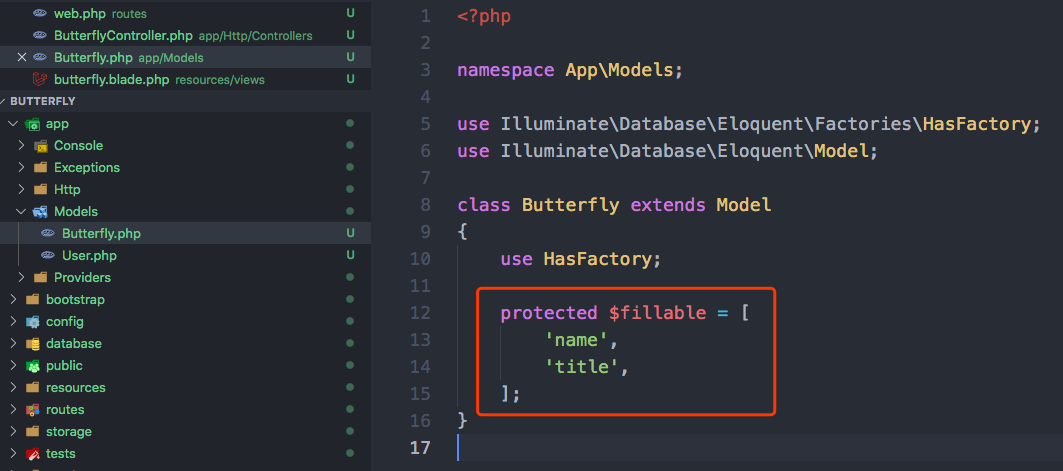
Open file app/Models/Butterfly.php and add property fillable:
protected $fillable = [
    'name',
    'title',
];
Start the migration
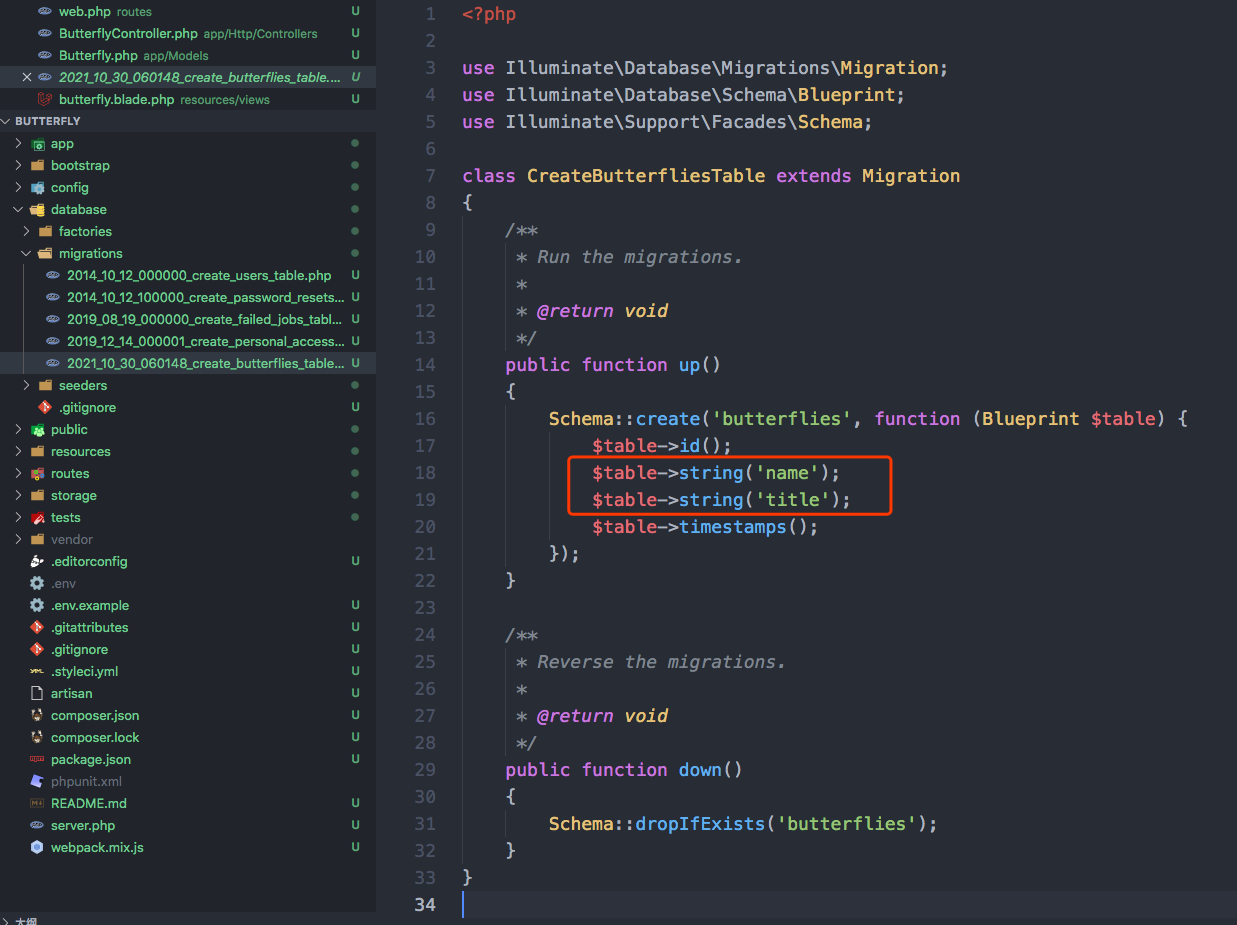
Open file 2021_10_30_060148_create_butterflies_table.php, the file name might be different in your case. Let's add some code to the migration file:
public function up()
{
    Schema::create('butterflies', function (Blueprint $table) {
        $table->id();
        $table->string('name');
        $table->string('title');
        $table->timestamps();
    });
}
Run the migration command and the database table should be created automatically:
$ php artisan migrate
Migration table created successfully.
Migrating: 2014_10_12_000000_create_users_table
Migrated:  2014_10_12_000000_create_users_table (34.15ms)
Migrating: 2014_10_12_100000_create_password_resets_table
Migrated:  2014_10_12_100000_create_password_resets_table (160.29ms)
Migrating: 2019_08_19_000000_create_failed_jobs_table
Migrated:  2019_08_19_000000_create_failed_jobs_table (83.89ms)
Migrating: 2019_12_14_000001_create_personal_access_tokens_table
Migrated:  2019_12_14_000001_create_personal_access_tokens_table (58.21ms)
Migrating: 2021_10_30_060148_create_butterflies_table
Migrated:  2021_10_30_060148_create_butterflies_table (18.88ms)
Let's check the result of the migration by entering the MySQL console:
mysql> use homestead;
mysql> show tables;
+------------------------+
| Tables_in_homestead    |
+------------------------+
| butterflies            |
| failed_jobs            |
| migrations             |
| password_resets        |
| personal_access_tokens |
| users                  |
+------------------------+
mysql> desc butterflies;
+------------+-----------------+------+-----+---------+----------------+
| Field      | Type            | Null | Key | Default | Extra          |
+------------+-----------------+------+-----+---------+----------------+
| id         | bigint unsigned | NO   | PRI | NULL    | auto_increment |
| name       | varchar(255)    | NO   |     | NULL    |                |
| title      | varchar(255)    | NO   |     | NULL    |                |
| created_at | timestamp       | YES  |     | NULL    |                |
| updated_at | timestamp       | YES  |     | NULL    |                |
+------------+-----------------+------+-----+---------+----------------+
Perfect! We have created the database table butterflies succesfully.
Basic actions
Let's add some basic CRUD actions to the data grid.
Listing
In this step, we will list the data from the database to a data grid:
Add index method to app/Http/Controllers/ButterflyController.php:
    public function index()
    {
        return view('butterfly')->with([
            'butterflies' => \App\Models\Butterfly::all(),
        ]);
    }
The variable $butterflies is now available in file resources/views/butterfly.blade.php. The variable $butterflies is a collection, we can render it in a loop.
Let's modify the view file:
          ...
          <tbody class="bg-white divide-y divide-gray-200">
            @foreach ($butterflies as $butterfly)
            <tr>
              <td class="px-6 py-4 whitespace-nowrap">
                <div class="flex items-center">
                  <div class="flex-shrink-0 h-10 w-10">
                    <img class="h-10 w-10 rounded-full" src="https://images.unsplash.com/photo-1494790108377-be9c29b29330?ixlib=rb-1.2.1&ixid=eyJhcHBfaWQiOjEyMDd9&auto=format&fit=facearea&facepad=4&w=256&h=256&q=60" alt="">
                  </div>
                  <div class="ml-4">
                    <div class="text-sm font-medium text-gray-900">
                      {{ $butterfly->name }}
                    </div>
                    <div class="text-sm text-gray-500">
                      jane.cooper@example.com
                    </div>
                  </div>
                </div>
              </td>
              <td class="px-6 py-4 whitespace-nowrap">
                <div class="text-sm text-gray-900">{{ $butterfly->title }}</div>
                <div class="text-sm text-gray-500">Optimization</div>
              </td>
              <td class="px-6 py-4 whitespace-nowrap text-right text-sm font-medium">
                <a href="#" class="text-indigo-500 hover:text-indigo-800 mx-5">Show</a>
                <a href="#" class="text-yellow-500 hover:text-yellow-800 mx-5">Edit</a>
                <a href="#" class="text-red-500 hover:text-red-800 mx-5">Delete</a>
              </td>
            </tr>
            @endforeach
            <!-- More people... -->
          </tbody>
          ...
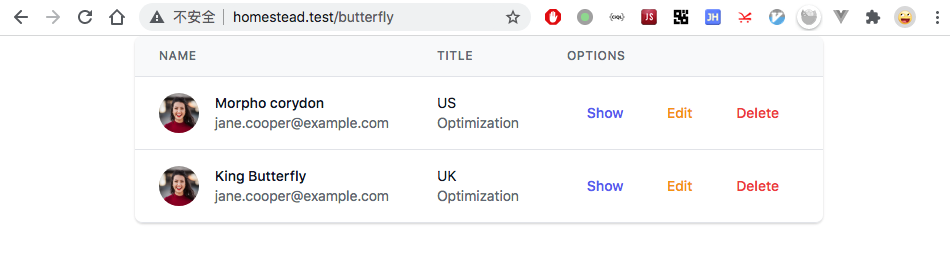
If we refresh the page now, we won't be able to see anything because there is no data yet. Let's manually insert some data to the database table:
mysql> INSERT INTO butterflies (`name`, `title`) VALUES ('Morpho corydon', 'US'), ('King Butterfly', 'UK');
Now refresh the browser:
Read action
This step is for the action read in CRUD.
Let's create a info page at resources/views/butterflyInfo.blade.php:
<!DOCTYPE html>
<html lang="en">
<head>
    <meta charset="UTF-8">
    <meta name="viewport" content="width=device-width, initial-scale=1.0">
    <link rel="stylesheet" href="https://cdn.jsdelivr.net/npm/tailwindcss@2.2.17/dist/tailwind.min.css">
    <title>Butterfly Info</title>
</head>
<body class="flex justify-center">
  <div class="mt-10 sm:mt-0">
    <div class="">
      <div class="">
        <h3 class="text-2xl font-medium leading-6 text-gray-900">Butterfly Information</h3>
      </div>
      <div class="">
        <form action="{{ isset($butterfly) ? '#' : '/butterfly' }}" method="POST">
          {{ csrf_field() }}
          {{ isset($butterfly) ? method_field('PUT') : ''}}
          <div class="shadow overflow-hidden sm:rounded-md">
            <div class="px-4 py-5 bg-white sm:p-6">
              <div class="grid grid-cols-6 gap-6">
                <div class="col-span-6 sm:col-span-3">
                  <label class="block text-sm font-medium text-gray-700">Name</label>
                  <input value="{{ isset($butterfly) ? $butterfly->name : '' }}" type="text" name="name" id="name" autocomplete="given-name" class="h-10 mt-1 focus:ring-indigo-500 focus:border-indigo-500 block w-full shadow-sm sm:text-sm border-gray-300 rounded-md">
                </div>
                <div class="col-span-6 sm:col-span-3">
                  <label class="block text-sm font-medium text-gray-700">Title</label>
                  <input value="{{ isset($butterfly) ? $butterfly->title : '' }}" type="text" name="title" id="title" autocomplete="family-name" class="h-10 mt-1 focus:ring-indigo-500 focus:border-indigo-500 block w-full shadow-sm sm:text-sm border-gray-300 rounded-md">
                </div>
            </div>
            <div class="px-4 py-3 bg-gray-50 text-right sm:px-6">
              <button type="submit" class="inline-flex justify-center py-2 px-4 border border-transparent shadow-sm text-sm font-medium rounded-md text-white bg-indigo-600 hover:bg-indigo-700 focus:outline-none focus:ring-2 focus:ring-offset-2 focus:ring-indigo-500">
                Save
              </button>
            </div>
          </div>
        </form>
      </div>
    </div>
  </div>
</body>
</html>
- Note the
actionproperty in theformelement. - Note we have used
{{ csrf_field() }}in in theformelement, this is a Laravel built-in CSRF feature. - Note there is a
{{ method_field('PUT') }}method in theformelement, it generates a hiddeninputfield, which allowsLaravelsendPOSTrequest to theupdatemethod.
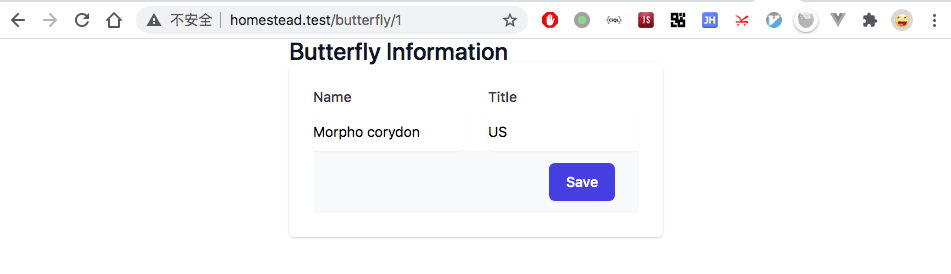
Modify the show method in app/Http/Controllers/ButterflyController.php:
    public function show($id)
    {
        return view('butterflyInfo')->with([
            'butterfly' => \App\Models\Butterfly::find($id),
        ]);
    }
Save and refresh our browser:
Add data
Add store method in app/Http/Controllers/ButterflyController.php:
    public function store(Request $request)
    {
        \App\Models\Butterfly::create($request->all());
        return redirect()->route('butterfly.index');
    }
The method redirect()->route('butterfly.index')redirects page to the route butterfly.index defined page.
Let's give it a try, hit the Create New button in http://homestead.test/butterfly, fill in some data and hit Save button, there should be some newly added records.
Edit data
Add update method in app/Http/Controllers/ButterflyController.php:
    public function update(Request $request, $id)
    {
        $butterfly = \App\Models\Butterfly::find($id);
        $butterfly->update($request->all());
        $butterfly->save();
        return redirect()->route('butterfly.index');
    }
Let's try it again, modify some data and click Save button. Check if the data is updated:
Delete data
We need a Delete request, so let's make it via XMLHttpRequest. Modify the resources/views/butterfly.blade.php file:
<td class="px-6 py-4 whitespace-nowrap text-right text-sm font-medium">
  ...
  <a id="delete" href="#" onclick="destroy('{{ route('butterfly.destroy', ['butterfly' => $butterfly->id]) }}')" class="text-red-500 hover:text-red-800 mx-5">Delete</a>
</td>
Add the code below:
  <script>
    var destroy = function(url){
      var xhr = new XMLHttpRequest();
      xhr.open("DELETE", url);
      xhr.setRequestHeader('Content-type','application/json; charset=utf-8');
      xhr.onload = function () {
        if (xhr.status == 200) {
          window.location.reload(true);
        } else {
          console.error(xhr.responseText);
        }
      }
      xhr.send(JSON.stringify({
        '_token': '{{ csrf_token() }}',
      }));
    }
  </script>
Add destroy in app/Http/Controllers/ButterflyController.php:
    public function destroy($id)
    {
        \App\Models\Butterfly::find($id)->delete();
        return response('success');
    }
Let's test it by hitting the Delete button:
Finish
Hope you enjoyed this tutorial and learned how to create CRUD grid using Laravel 8 and TailwindCSS.