Livewire CRUD with Laravel 9 and Tailwind CSS
Create Database Schema
The following scripts are supposed to run from your command line terminal.
- Log in to MySQL console:
mysql -u root -p
- Create a demo database:
CREATE DATABASE livewire_laravel_9;
I am assuming the root user has full access to the livewire_laravel_9 database. If not, you need to assign the permissions correctly.
Laravel Setup
- Install a brand-new Laravel project via composer
composer create-project laravel/laravel livewire-laravel-9
- Modify the environment variables in the
.envto give database permissions to:
DB_DATABASE=livewire_laravel_9
DB_USERNAME=root
DB_PASSWORD=root
Update your own DB_USERNAME and DB_PASSWORD accordingly.
- Start the Laravel dev server by running the command below.
cd livewire-laravel-9
php artisan serve
You should see the default Laravel welcome page by accessing http://127.0.0.1:8000/ from your browser:
Data Setup
We need some data to demonstrate the use of Datatables powered HTML table. In this step, we will create some data with minimum effort. We are going to use the default Laravel users table as the data source.
- Run migration to create some Laravel's default database tables:
php artisan migrate
- Create some dummy data for
userstable, run the command below from your terminal:
php artisan tinker
User::factory()->count(20)->create();
This will create 20 records in your users table.
Livewire Setup
- Install the PHP packages
composer require livewire/livewire
- Install the Assets
Create a layout file and include the Balde directives:
<!DOCTYPE html>
<html lang="{{ str_replace('_', '-', app()->getLocale()) }}" class="h-full">
<head>
    <meta charset="utf-8">
    <meta name="viewport" content="width=device-width, initial-scale=1">
    <meta name="csrf-token" content="{{ csrf_token() }}">

    <title>{{ config('app.name', '') }}</title>


    <link rel="stylesheet" href="{{ mix('css/app.css') }}">

    @livewireStyles
</head>
<body>

<div class="max-w-4xl mx-auto mt-5">
    <div class="px-4 sm:px-6 lg:px-8">
        <h1 class="text-3xl font-black">Livewire CRUD with Laravel 9 and Tailwind CSS</h1>
    </div>
</div>


{{ $slot }}


@livewireScripts
</body>
</html>
Tailwind CSS Setup
- Install Tailwind CSS
npm install -D tailwindcss postcss autoprefixer
npx tailwindcss init
- Add Tailwind to your Laravel Mix configuration, open file
webpack.mix.js:
mix.js("resources/js/app.js", "public/js")
  .postCss("resources/css/app.css", "public/css", [
    require("tailwindcss"),
  ]);
- Configure your template paths in file
tailwind.config.js:
module.exports = {
  content: [
    "./resources/**/*.blade.php",
    "./resources/**/*.js",
    "./resources/**/*.vue",
  ],
  theme: {
    extend: {},
  },
  plugins: [],
}
- Add the Tailwind directives to your CSS in file
./resources/css/app.css:
@tailwind base;
@tailwind components;
@tailwind utilities;
- Now run the command below to compile the assets:
npm install
npm run watch
You should see a Laravel Mix message indicating successful compilation.
Work on the Livewire Components
Work on the ShowUsers Component
The ShowUsers component is responsible for listing all users.
- Create a new
ShowUserscomponent:
php artisan make:livewire ShowUsers
Two files should be created:
-
app/Http/Livewire/ShowUsers.php -
resources/views/livewire/show-users.blade.php
In file app/Http/Livewire/ShowUsers.php, we simply fetch all the users records and assign them to the view:
<?php

namespace App\Http\Livewire;

use App\Models\User;
use Livewire\Component;

class ShowUsers extends Component
{
    public function render()
    {
        return view('livewire.show-users', [
            'users' => User::all()
        ]);
    }
}
In file resources/views/livewire/show-users.blade.php, we loop through users and display them in a table, make sure your Blade view only has ONE root element, this is how Livewire works:
<div class="max-w-4xl mx-auto mt-5">
    <div class="px-4 sm:px-6 lg:px-8">
        <div class="sm:flex sm:items-center">
            <div class="sm:flex-auto">
                <h1 class="text-xl font-semibold text-gray-900">Users</h1>
                <p class="mt-2 text-sm text-gray-700">A list of all the users.</p>
            </div>
            <div class="mt-4 sm:mt-0 sm:ml-16 sm:flex-none">
                <a href="/user/add"
                        class="inline-flex items-center justify-center rounded-md border border-transparent bg-indigo-600 px-4 py-2 text-sm font-medium text-white shadow-sm hover:bg-indigo-700 focus:outline-none focus:ring-2 focus:ring-indigo-500 focus:ring-offset-2 sm:w-auto">
                    Add user
                </a>
            </div>
        </div>
        <div class="mt-8 flex flex-col">
            <div class="-my-2 -mx-4 overflow-x-auto sm:-mx-6 lg:-mx-8">
                <div class="inline-block min-w-full py-2 align-middle md:px-6 lg:px-8">
                    <div class="overflow-hidden shadow ring-1 ring-black ring-opacity-5 md:rounded-lg">
                        <table class="min-w-full divide-y divide-gray-300">
                            <thead class="bg-gray-50">
                            <tr>
                                <th scope="col"
                                    class="py-3 pl-4 pr-3 text-left text-xs font-medium uppercase tracking-wide text-gray-500 sm:pl-6">
                                    ID
                                </th>
                                <th scope="col"
                                    class="px-3 py-3 text-left text-xs font-medium uppercase tracking-wide text-gray-500">
                                    Name
                                </th>
                                <th scope="col"
                                    class="px-3 py-3 text-left text-xs font-medium uppercase tracking-wide text-gray-500">
                                    Email
                                </th>
                                <th scope="col" class="relative py-3 pl-3 pr-4 sm:pr-6">
                                    <span class="sr-only">Edit</span>
                                </th>
                            </tr>
                            </thead>
                            <tbody class="divide-y divide-gray-200 bg-white">

                            @foreach($users as $user)
                                <tr>
                                    <td class="whitespace-nowrap py-4 pl-4 pr-3 text-sm font-medium text-gray-900 sm:pl-6">
                                        {{ $user->id }}
                                    </td>
                                    <td class="whitespace-nowrap px-3 py-4 text-sm text-gray-500">
                                        {{ $user->name }}
                                    </td>
                                    <td class="whitespace-nowrap px-3 py-4 text-sm text-gray-500">
                                        {{ $user->email }}
                                    </td>
                                    <td class="relative whitespace-nowrap py-4 pl-3 pr-4 text-right text-sm font-medium sm:pr-6">
                                        <a href="/user/edit/{{ $user->id }}"
                                            class="text-indigo-600 hover:text-indigo-900">Edit</a>
                                    </td>
                                </tr>
                            @endforeach
                            </tbody>
                        </table>
                    </div>
                </div>
            </div>
        </div>
    </div>
</div>
-
ShowUsersis a full page component, create a route inroutes/web.php:
Route::get('/user', ShowUsers::class);
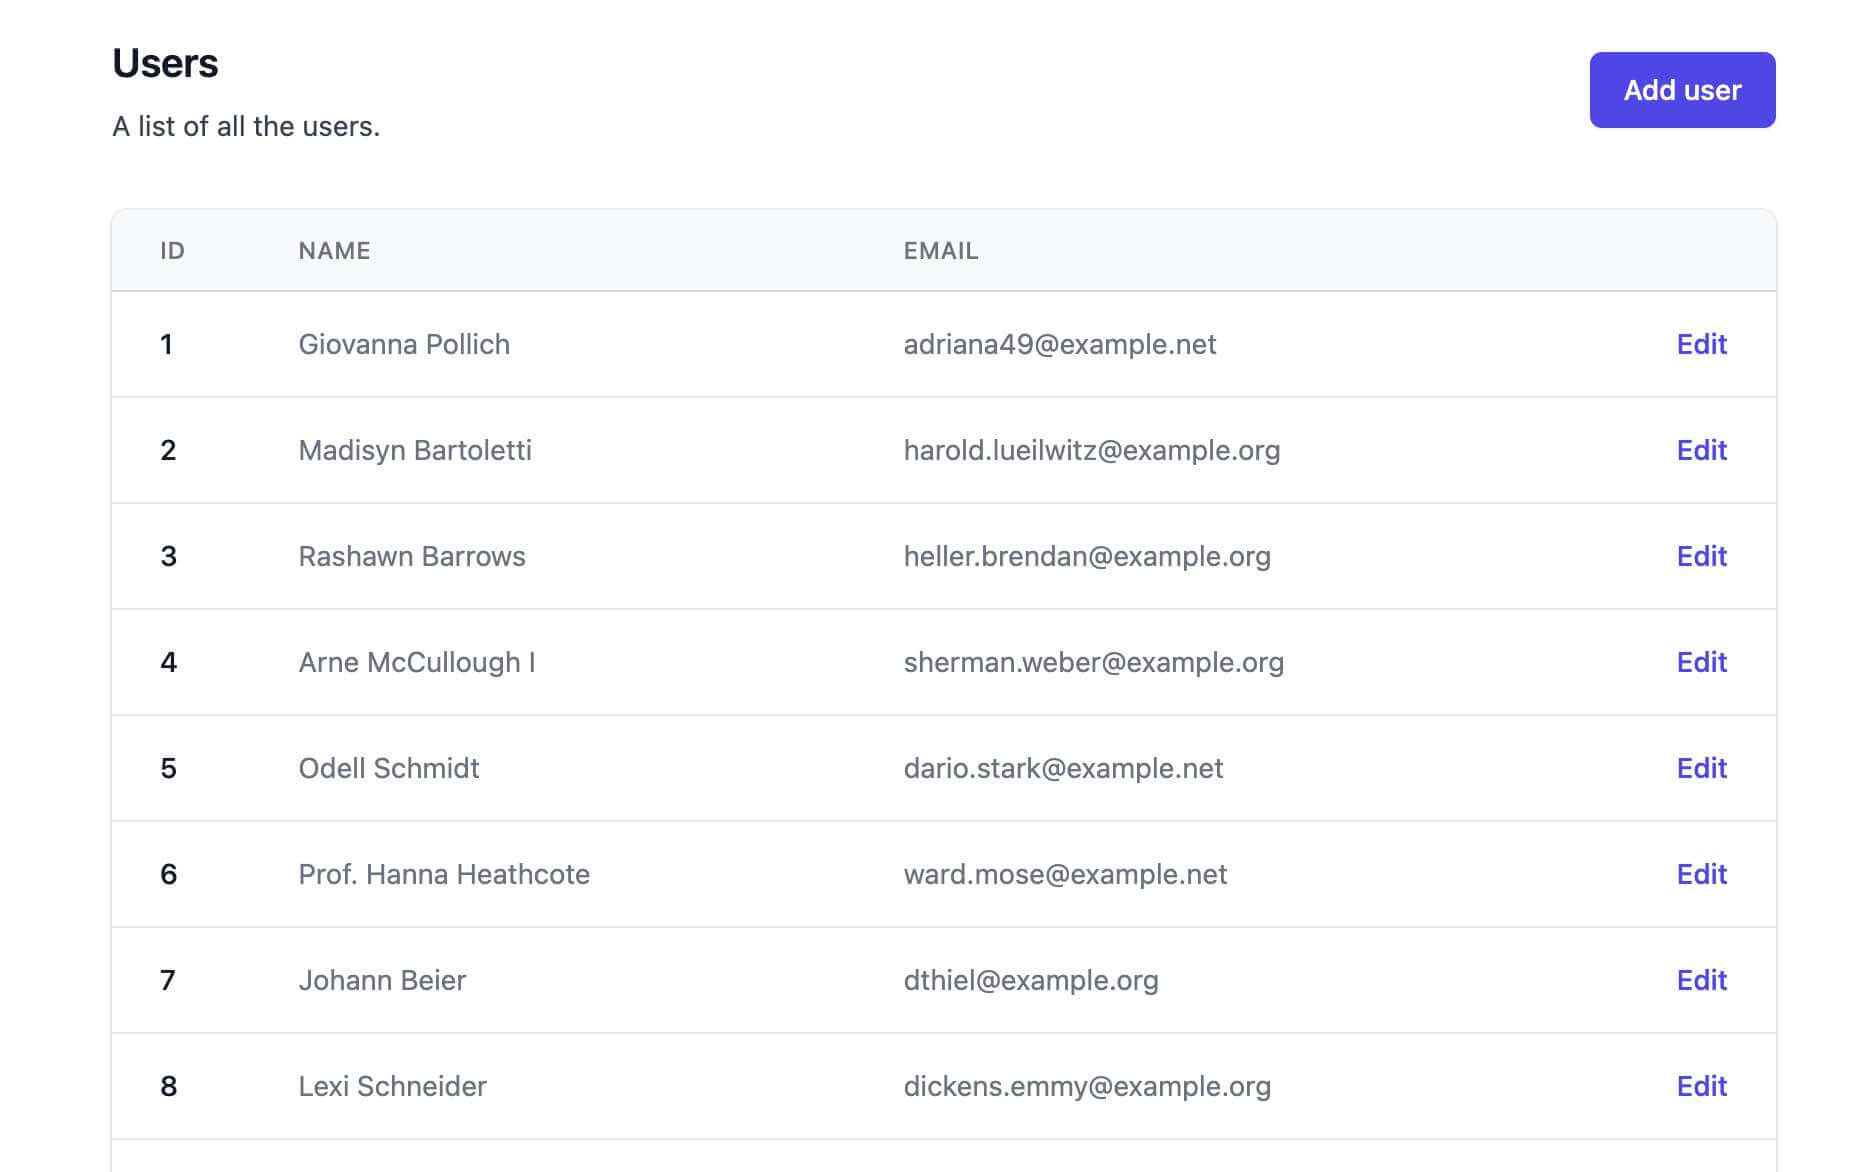
Now navigate to http://127.0.0.1:8000/user from your browser and you should see a nice table view:
Work on the CreateUser Component
The CreateUser component is responsible for creating a user. Which is the create action in CRUD.
- Create a new
CreateUsercomponent:
php artisan make:livewire CreateUser
Two files should be created:
-
app/Http/Livewire/CreateUser.php -
resources/views/livewire/create-user.blade.php
In file CreateUser.php, copy the content below:
<?php

namespace App\Http\Livewire;

use App\Models\User;
use Livewire\Component;

class CreateUser extends Component
{
    public User $users ;

    protected $rules = [
        'users.name' => 'required|string|min:6',
        'users.email' => 'required|string|max:500|unique:users',
    ];

    public function mount()
    {
        $this->users = new User();
    }

    public function save()
    {
        $this->validate();

        $this->users->password = time();

        $this->users->save();

        return redirect()->to('/user');
    }

    public function render()
    {
        return view('livewire.create-user');
    }
}
- We store the Eloquent model
Userin a public variable, this is needed for Livewire to function properly. - Similar to standard Laravel validation, Livewire provides a
$rulesproperty for us to supply some validation rules. - In the method
mount, we initialize an emptyUsermodel for Livewire to recognize it as an Eloquent model. - Method
saveis triggered when the form is submitted, in this function, we call Livewire's validation function, followed by Eloquent's save function, and lastly we redirect the page to the index page. - In the method
render, we simply render the view file, which we are going to work on next.
Open file resources/views/livewire/create-user.blade.php and copy the content below:
<div class="max-w-4xl mx-auto mt-5">
    <div class="px-4 sm:px-6 lg:px-8">
        <form wire:submit.prevent="save">
            <div class="mb-6">
                <label for="name" class="block mb-2 text-sm font-medium text-gray-900 dark:text-gray-300">Your
                    name</label>
                <input type="text"
                        wire:model="users.name"
                       class="bg-gray-50 border border-gray-300 text-gray-900 text-sm rounded-lg focus:ring-blue-500 focus:border-blue-500 block w-full p-2.5 dark:bg-gray-700 dark:border-gray-600 dark:placeholder-gray-400 dark:text-white dark:focus:ring-blue-500 dark:focus:border-blue-500"
                       placeholder="Joh"
                       required="">
                @error('users.name') <span class="text-sm text-red-500">{{ $message }}</span> @enderror
            </div>
            <div class="mb-6">
                <label for="email" class="block mb-2 text-sm font-medium text-gray-900 dark:text-gray-300">Your
                    email</label>
                <input type="email"
                       wire:model="users.email"
                       class="bg-gray-50 border border-gray-300 text-gray-900 text-sm rounded-lg focus:ring-blue-500 focus:border-blue-500 block w-full p-2.5 dark:bg-gray-700 dark:border-gray-600 dark:placeholder-gray-400 dark:text-white dark:focus:ring-blue-500 dark:focus:border-blue-500"
                       placeholder="name@flowbite.com" required="">
                @error('users.email') <span class="text-sm text-red-500">{{ $message }}</span> @enderror
            </div>
            <div class="flex items-center justify-start space-x-4">
                <a href="/user" class="text-gray-900  font-medium  text-sm ">Back</a>
                <button type="submit"
                        class="text-white bg-blue-700 hover:bg-blue-800 focus:ring-4 focus:ring-blue-300 font-medium rounded-lg text-sm w-full sm:w-auto px-5 py-2.5 text-center dark:bg-blue-600 dark:hover:bg-blue-700 dark:focus:ring-blue-800">
                    Save
                </button>
            </div>
        </form>

    </div>
</div>
A couple of places to take note:
-
<form wire:submit.prevent="save">tells the form to callsavemethod ofCreateUsercomponent. - All the variables are stored in Livewire model, you recognize them by the
wire:modelsyntax.
Lastly, append the following route to routes/web.php file:
Route::get('/user/add', CreateUser::class);
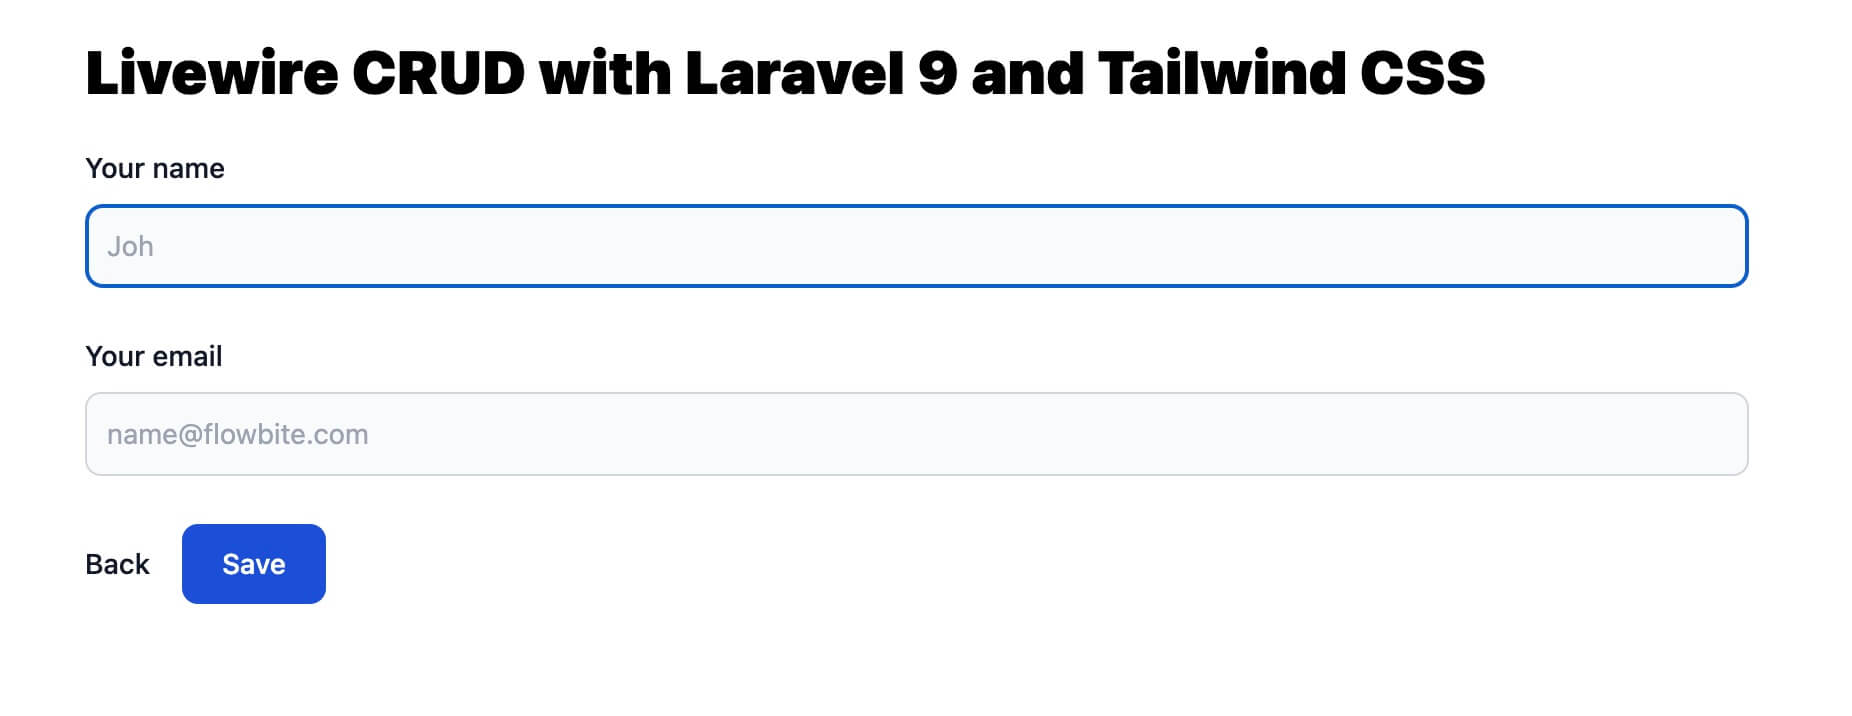
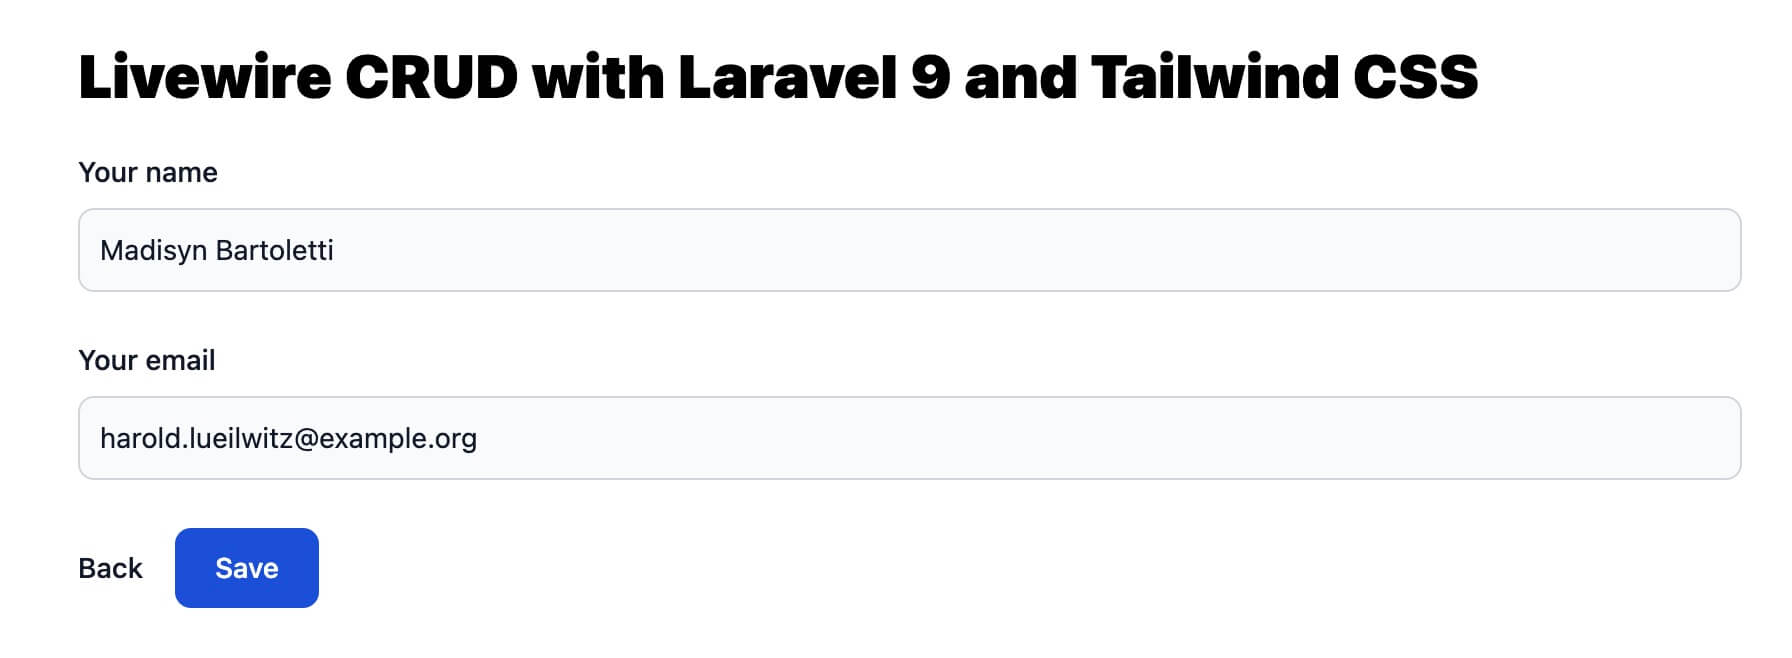
Now open your browser and head to http://127.0.0.1:8000/user/add, you should be able to see a nicely working user creation form page:
Work on the EditUser Component
The CreateUser component is responsible for creating a user. Which is the create action in CRUD.
- Create a new
CreateUsercomponent:
php artisan make:livewire CreateUser
Two files should be created:
-
app/Http/Livewire/EditUser.php -
resources/views/livewire/edit-user.blade.php
In file EditUser.php, copy the content below:
This file is almost identical to app/Http/Livewire/CreateUser.php, the main difference is that we have shifted the $rules to a method instead of the original property. The reason is we need to exclude the current user id when applying the unique rule.
Open file resources/views/livewire/edit-user.blade.php and copy the content below:
This file is identical to resources/views/livewire/create-user.blade.php.
Lastly, append the following route to routes/web.php file:
Route::get('/user/edit/{user}', EditUser::class);
The {user} declaration is the key here, by using this route, Livewire automatically helps dihydrate the model for us.
Now open your browser and head to http://127.0.0.1:8000/user and click the Edit link, you should be able to see a nicely working user edition form page:
Work on the Delete action
One last feature missing from CRUD actions is the Delete. Now open file app/Http/Livewire/ShowUsers.php and add another method:
public function delete(User $user)
{
    $user->delete();
}
Open file resources/views/livewire/show-users.blade.php and add a delete link right after the edit link:
<a href="#"
   onclick="confirm('Are you sure you want to remove the user') || event.stopImmediatePropagation()"
   wire:click="delete({{ $user->id }})"
   class="text-red-600 hover:text-red-900">Delete</a>
Now open your browser and head to http://127.0.0.1:8000/user and click the Delete link, you should be able to delete any user:

End Result
Now head to http://127.0.0.1:8000/user from your browser. You should see a nicely working Datatables powered HTML table:
Source Code
If you follow along with the tutorial step by step, you will get all the source code in place. However, if you are feeling lazy or need to download the complete source code from us. You can do so by paying us a small fee. Your support will enable us to produce better and more in-depth tutorials.