Using Select2 with Laravel Livewire
In this tutorial, we will demonstrate how to use Select2 with Laravel Livewire. The tech stack included in this tutorial are TailwindCSS for CSS, jQuery and Select2.
Installation
- Install Livewire package via Composer:
composer require livewire/livewire
- Create a Laravel layout file(
resources/views/layouts/select2.blade.php), we are pulling all the Javascript and CSS from their respective CDN network (The purpose is to keep the tutorial setup easy to follow. However in your project, we highly suggest that you set up the Javascript and CSS locally):
<!DOCTYPE html>
<html lang="{{ str_replace('_', '-', app()->getLocale()) }}">
<head>
    <meta charset="utf-8">
    <meta name="viewport" content="width=device-width, initial-scale=1">
    <meta name="csrf-token" content="{{ csrf_token() }}">

    <title>Using Select2 with Laravel Livewire</title>

    <link rel="stylesheet" href="https://fonts.googleapis.com/css2?family=Nunito:wght@400;600;700&display=swap">


    <script src="https://cdn.tailwindcss.com"></script>
    <link href="https://cdn.jsdelivr.net/npm/select2@4.1.0-rc.0/dist/css/select2.min.css" rel="stylesheet"/>


    <script src="//cdn.jsdelivr.net/npm/bootstrap@5.0.0-beta2/dist/js/bootstrap.min.js"></script>
    <script src="//cdnjs.cloudflare.com/ajax/libs/jquery/3.2.1/jquery.min.js"></script>
    <script src="https://cdn.jsdelivr.net/npm/select2@4.1.0-rc.0/dist/js/select2.min.js"></script>

    @livewireStyles
</head>

<body class="bg-gray-200" style="font-family: Nunito;">


<div class="max-w-7xl mx-auto px-4 py-4 sm:py-6 lg:py-8 sm:px-6 lg:px-8 ">
    {{ $slot }}
</div>

@livewireScripts
@stack('scripts')
</body>
</html>
Working on Livewire Component
Create a Livewire component to work with Select2. Run the command below from CLI to generate the component files:
php artisan make:livewire Select2
You should see two generated files at:
-
app/Http/Livewire/Select2.php -
resources/views/livewire/select2.blade.php
File app/Http/Livewire/Select2.php is the component class file whereas resources/views/livewire/select2.blade.php is
the view file.
Let's create content for the class file(app/Http/Livewire/Select2.php):
<?php

namespace App\Http\Livewire;

use Livewire\Component;

class Select2 extends Component
{
    public $selected = '';

    public $series = [
        'Wanda Vision',
        'Money Heist',
        'Lucifer',
        'Stranger Things',
    ];

    public function render()
    {
        return view('livewire.select2')
                ->layout('layouts.select2');
    }
}
- The variable
$selectedis to store the user's selection value. - The variable
$seriesis to provide options for the selected input.
In the function render(), we instruct Livewire to render a view file resources/views/livewire/select2.blade.php
using the layout file at resources/views/layouts/select2.blade.php.
This is the pretty standard way of using Livewire component.
Next, we will move on to work on the Select2 part of the system, which requires some custom tricks.
Working on Livewire View
Copy and paste the view file(resources/views/livewire/select2.blade.php) content below and we will explain the key
parts of the view file in the following step:
<div>
    <div class="max-w-3xl mx-auto mb-2">
        <div class="bg-white rounded-lg">
            <div class="max-w-7xl mx-auto py-16 px-4 sm:py-24 sm:px-6 lg:px-8">
                <div class="text-center">
                    <p class="mt-1 text-4xl font-extrabold text-gray-900 sm:text-5xl sm:tracking-tight lg:text-6xl">
                        Using Select2 with Laravel Livewire
                    </p>
                </div>
            </div>
        </div>
    </div>

    <div class="max-w-3xl mx-auto mb-2">
        <div class="bg-white rounded-lg p-5">

            <div class="grid sm:grid grid-cols-1 sm:grid-cols-2 gap-4">
                <div wire:ignore>
                    <select class="form-control" id="select2">
                        <option value="">Select Option</option>
                        @foreach($series as $item)
                            <option value="{{ $item }}">{{ $item }}</option>
                        @endforeach
                    </select>
                </div>

                <div>
                    You have selected: <strong>{{ $selected }}</strong>
                </div>
            </div>


        </div>
    </div>

</div>

@push('scripts')

    <script>
        $(document).ready(function () {
            $('#select2').select2();
            $('#select2').on('change', function (e) {
                var data = $('#select2').select2("val");
            @this.set('selected', data);
            });
        });
    </script>

@endpush
The jQuery Select2 manipulates the DOM as soon as they are initialized and continues to mutate the DOM as you interact
with them. This makes it impossible for Livewire to keep track, in this case, we can make use of
Livewire's wire:ignore tag. This tells Livewire to ignore this part of DOM. That is what the following part of the
code has done:
......
<div wire:ignore>
    <select class="form-control" id="select2">
        <option value="">Select Option</option>
        @foreach($series as $item)
            <option value="{{ $item }}">{{ $item }}</option>
        @endforeach
    </select>
</div>
......
Now Livewire has ignored the Select2 part of the code, so it has no idea how to deal with $selected variable in its
component class.
In fact, all we need Livewire to know is the value of the selection box is changed and what value it has updated to. In
a case like this, we can use the special $this blade directive
to set the value fo $selected:
@push('scripts')

    <script>
        $(document).ready(function () {
            $('#select2').select2();
            $('#select2').on('change', function (e) {
                var data = $('#select2').select2("val");
            @this.set('selected', data);
            });
        });
    </script>

@endpush
That is what we have done in the code above. We listen to Select2 change event via jQuery, and set the value for
Livewire's variable $selected via the $this blade directive.
Finalising the Demo
The last piece of the demo is to render the Livewire component Select2 to the browser, this is done simply via the
route file routes/web.php:
Route::get('/select2', Select2::class);
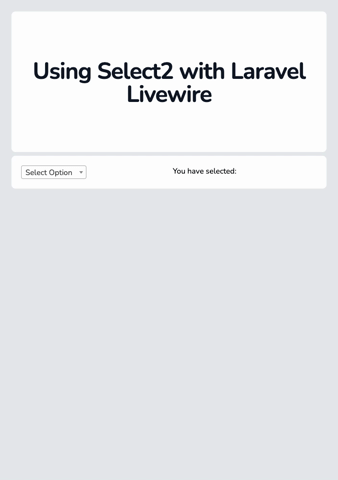
Now start a simple server via Laravel: php artisan serve and visit http://127.0.0.1:8000/select2 from your browser,
and you should see a nice working Select2 dropdown.
Source Code
If you follow along with the tutorial step by step, you will get all the source code in place. However, if you are feeling lazy or need to download the complete source code from us. You can do so by paying us a small fee. Your support will enable us to produce better and more in-depth tutorials.